Team Management
Invite doctors and staff, assign roles, and fine-tune per-member permissions from the User Management page.
Add doctors and staff to your clinic, control exactly what each person can do, and deactivate accounts you no longer need. Everything happens on the User Management page.
Where to find it
Select the gear icon in the top-right header, then Team Members. The User Management page opens (breadcrumbs show Settings / User Management) with a member-count badge next to the heading.
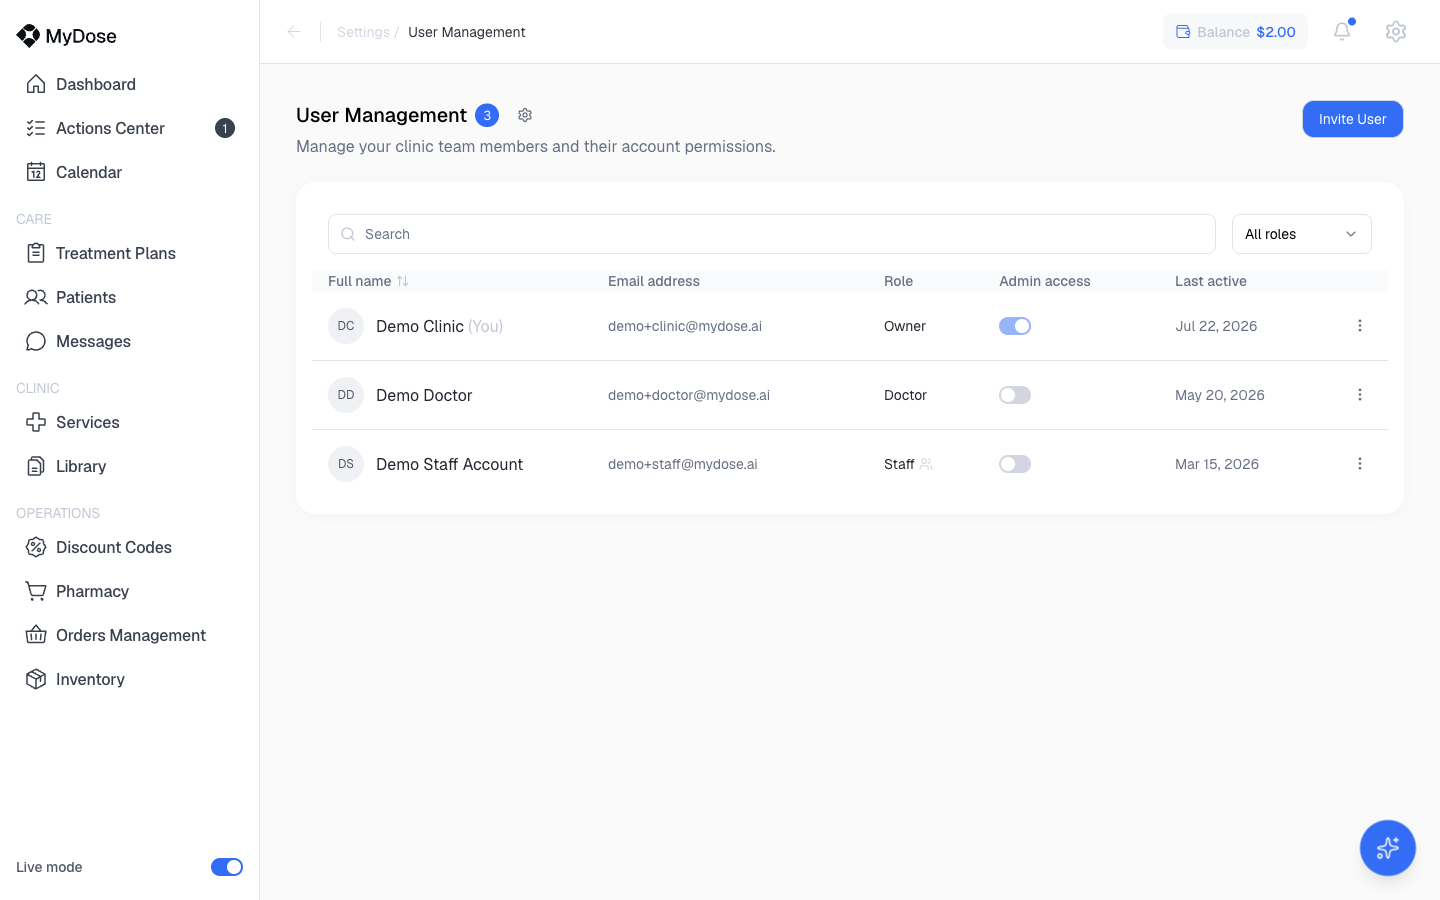
The table lists every member with columns Full name, Email address, Role, Admin access (a toggle), and Last active, plus an actions menu (⋯) at the end of each row with View details, Edit profile, Reset password, and Deactivate. Use the search box or the All roles filter to find someone quickly.
Team roles
| Role | What they can do |
|---|---|
| Owner | Full access to everything, including admin settings. Owners implicitly hold all permissions. |
| Doctor | All prescriber permissions by default — prescribing, adjusting and approving treatments, approving intakes, ordering labs, and managing appointments and patients. Can be narrowed per member. |
| Staff | Scheduling and canceling appointments, adding and managing patients, and ordering bloodwork. No prescribing or approvals. |
The small gear next to the User Management heading opens the User Permissions page, which shows the default access each role starts with. The full matrix is documented in Roles & Permissions.
Inviting a team member
Open User Management
Select the gear icon in the header, then Team Members.
Select Invite User
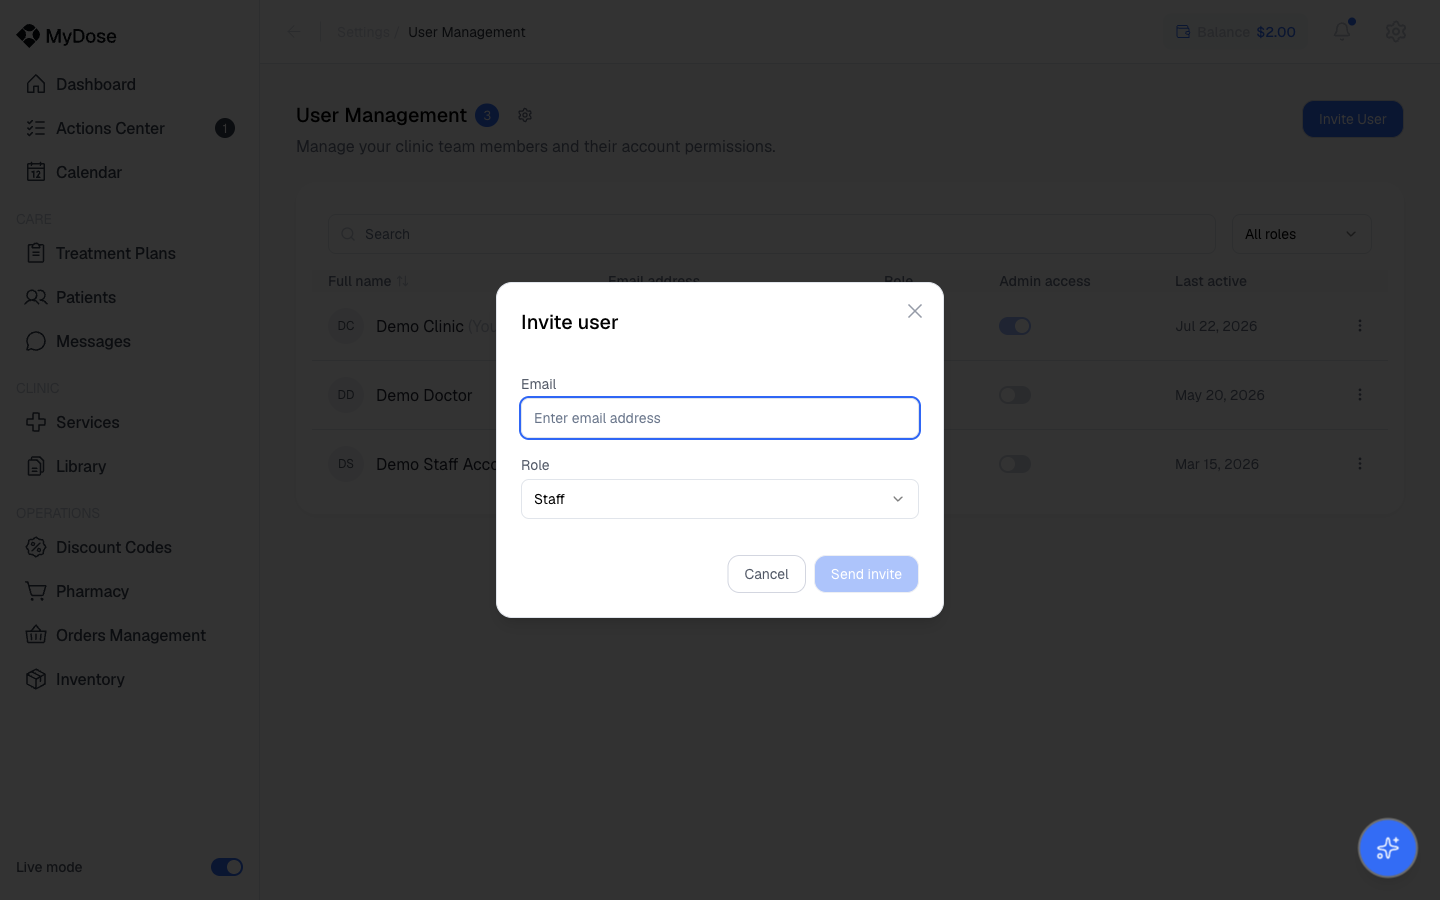
The Invite user modal opens.
Enter their email and role
Type the person's email address and pick a role from the dropdown. The role defaults to Staff — switch it to Doctor for prescribers.
Select Send invite
Once the member joins, they appear in the table. You can adjust their permissions at any time afterward.
Editing a team member's role or permissions
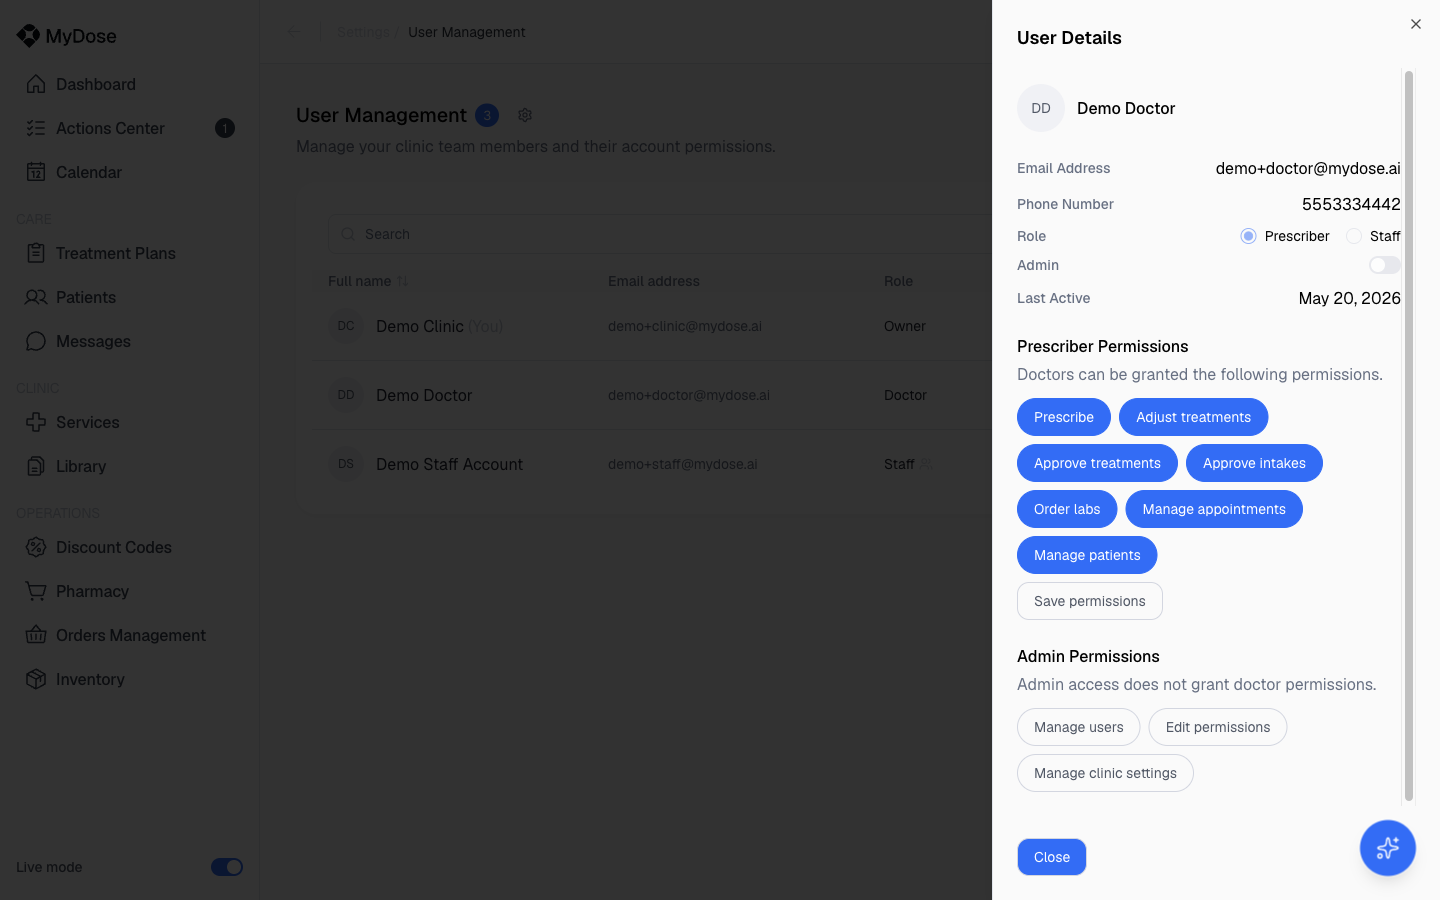
Per-member permissions are edited in the User Details dialog.
Open the member's details
Find the member in the table, select the actions menu (⋯) at the end of their row, then select View details.
Set their type
Choose Prescriber or Staff with the radio buttons.
Toggle admin access
Use the admin-access switch to control whether this member can manage users and clinic settings. The dialog's Admin Permissions section shows what that covers — see Roles & Permissions.
Fine-tune Prescriber Permissions
Toggle any of the seven permissions: Prescribe, Adjust treatments, Approve treatments, Approve intakes, Order labs, Manage appointments, and Manage patients.
Select Save permissions
Your changes are applied to that member.
The Admin access column in the team table shows each member's admin status at a glance.
Deactivating a team member
There's no delete — you deactivate accounts instead, from the same actions menu that holds Edit profile and Reset password.
Open the actions menu
Select ⋯ at the end of the member's row.
Select Deactivate
The member's account is deactivated and they can no longer access your clinic.
Prescriber credentials
Inviting a doctor doesn't make them prescription-ready. Each prescriber verifies their own NPI number, DEA registration, and state medical licenses under their account's Licensing tab — see Prescriber Credentials for the walkthrough.
Related
Roles & Permissions
The full role-based access matrix behind the User Permissions page.
Prescriber Credentials
NPI, DEA, and state license verification for doctors.
Clinic Setup
Finish the account-setup checklist so your team can start treating patients.
Navigating the Portal
Find your way around the sidebar, header, and gear menu.