Create a Service Package
Walk through the five-step Custom Package wizard — package basics, visit requirements, medication, treatment schedule, and pricing.
The Custom Package wizard builds a fully customizable treatment from scratch, managed and fulfilled by your clinic. This page walks through all five steps of the wizard, from naming the package to setting its price.
Where to find it
Open Services
In the sidebar, under the CLINIC group, select Services.
Start a new package
Select Create Package. The New Package dialog offers three options: Custom Package, MyDose Approved, and Lab Only.
Choose Custom Package
Select Custom Package — "Create a fully customizable treatment from scratch managed and fulfilled by your clinic." — then select Continue.
The wizard shows a progress rail with five steps — Package basics, Visit requirements, Medication, Treatment schedule, and Pricing — plus Exit, Save & Exit, and Continue controls.
| Control | What it does |
|---|---|
| Continue | Advances to the next step. It stays disabled until the current step's required fields are complete. |
| Save & Exit | Lets you leave the wizard and return to finish later. |
| Exit | Closes the wizard. |
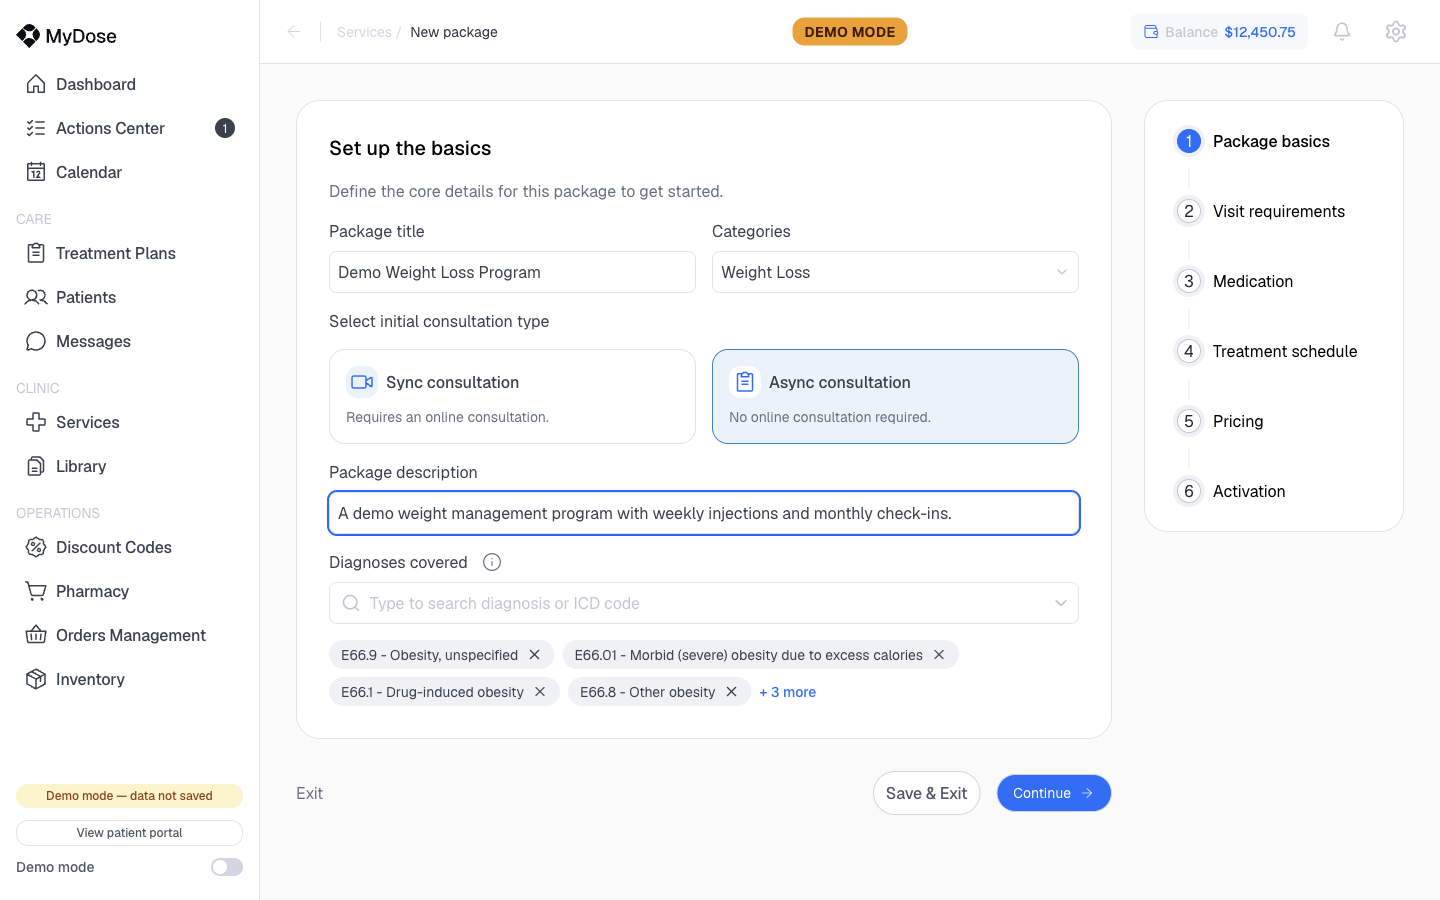
Set up the basics
Give the package a name, categories, and a description.
Enter a Package title
Type the name patients and staff will see in the Package title field.
Select categories
Under Select categories, check one or more categories (for example, Weight Loss).
Add diagnoses covered
Choosing a category reveals a diagnoses covered section. Search by diagnosis or ICD code, or select from the suggested diagnosis chips. The "About diagnoses covered" explainer describes how these are used.
Write a Package description
Fill in the Package description, then select Continue.
Set visit requirements
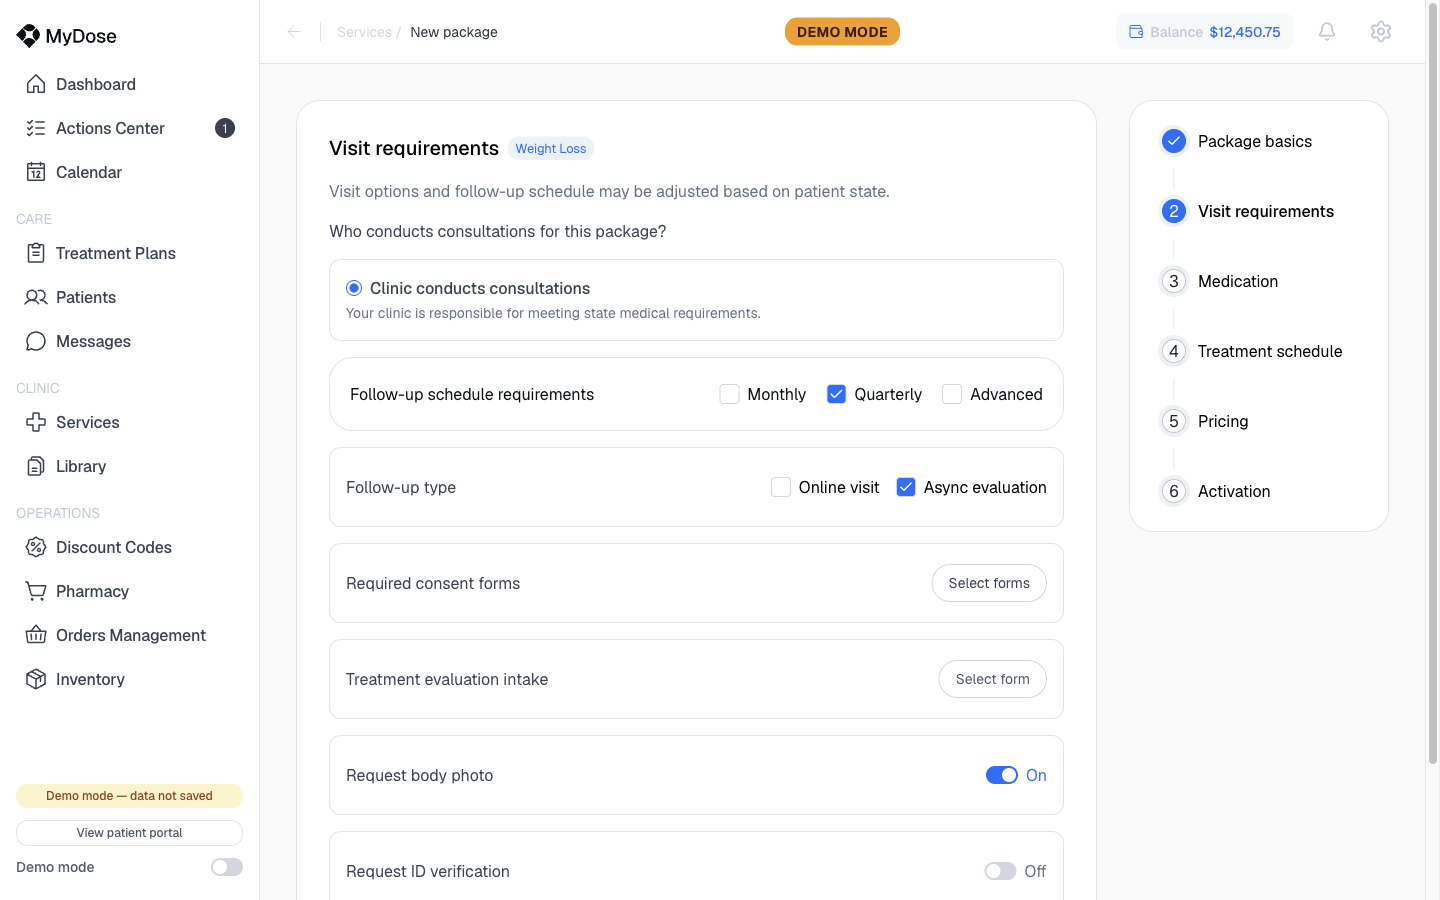
Define who conducts consultations, how often patients are seen, and which forms they complete.
Confirm consultation responsibility
Review the consultation-responsibility choice: Clinic conducts consultations — your clinic is responsible for meeting state medical requirements.
Choose visit frequency
Check Monthly, Quarterly, or Advanced.
Choose visit types
Select Online visit, Async evaluation, or both.
Add consent forms
Select Select forms to open the Select consent forms panel. Use the Available and Add New tabs, check the informed-consent forms you need (for example, Weight Loss Informed Consent or Hormone Therapy Informed Consent), then select Add Selected Forms.
Add an intake form
The second selector opens a General evaluation intake picker with your intake forms (for example, General Intake, TRT Intake, Anti-Aging Intake). Pick one and select Add Selected Form, then select Continue.
Choose the medication
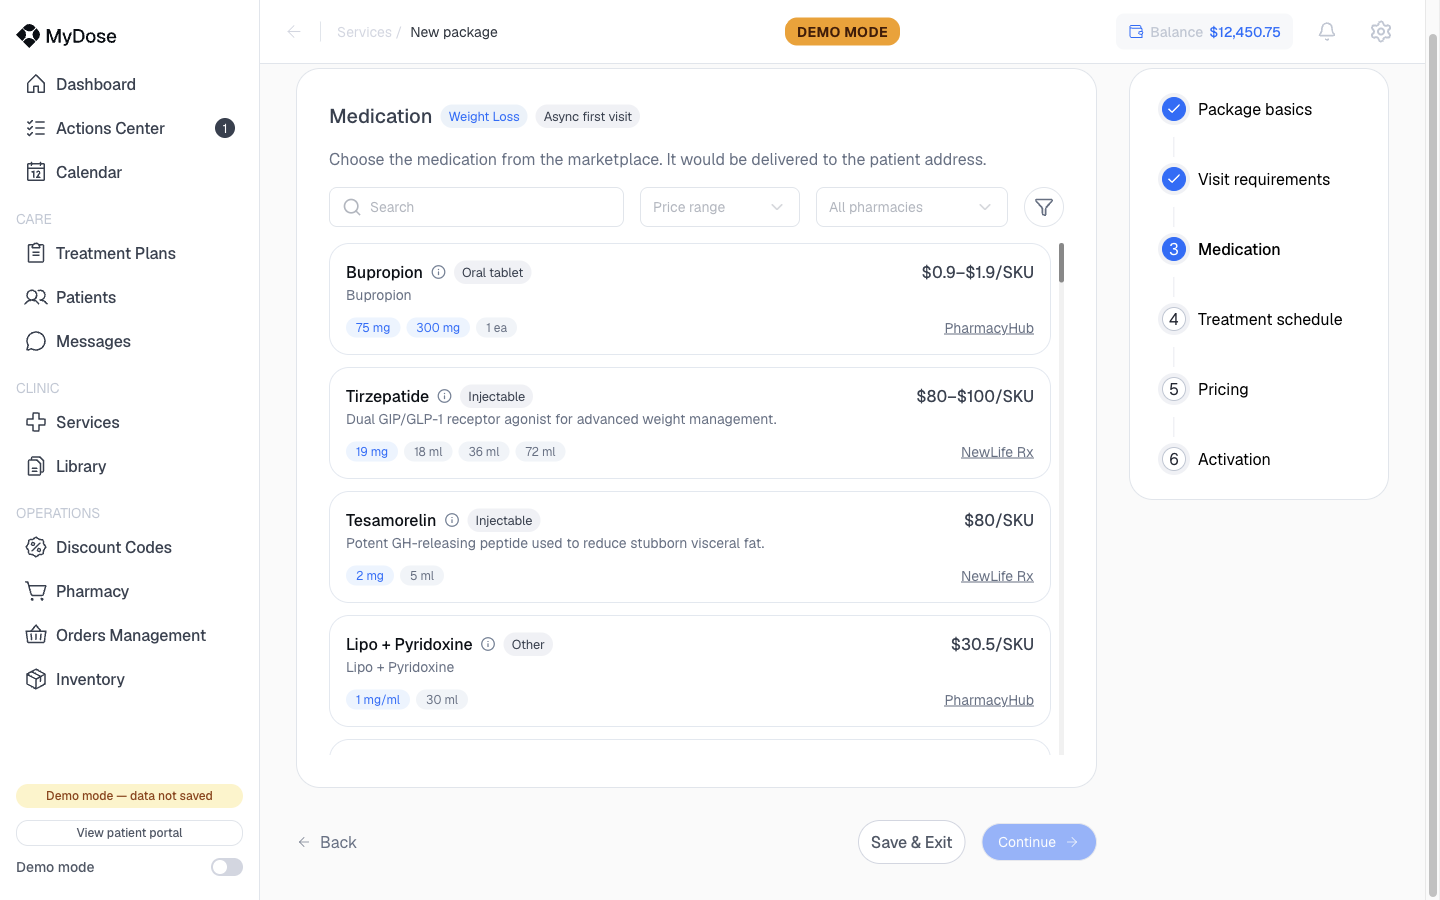
Pick the product the package prescribes from the searchable catalog.
Search and filter the catalog
Search by name, or narrow the list with the price range, pharmacy, and additional filters.
Compare product cards
Each card shows the product name, its form (Injectable, Oral tablet, Oral strips, and so on), the price per SKU (for example, $100–$140/SKU), a short description, the available strengths and sizes, and the fulfilling pharmacy (for example, NewLife Rx, PharmacyHub, or StrikerRX).
Select the product
If the product comes in multiple forms, the Select medication form dialog opens — pick a form and select Confirm. Then select Continue.
Build the treatment schedule
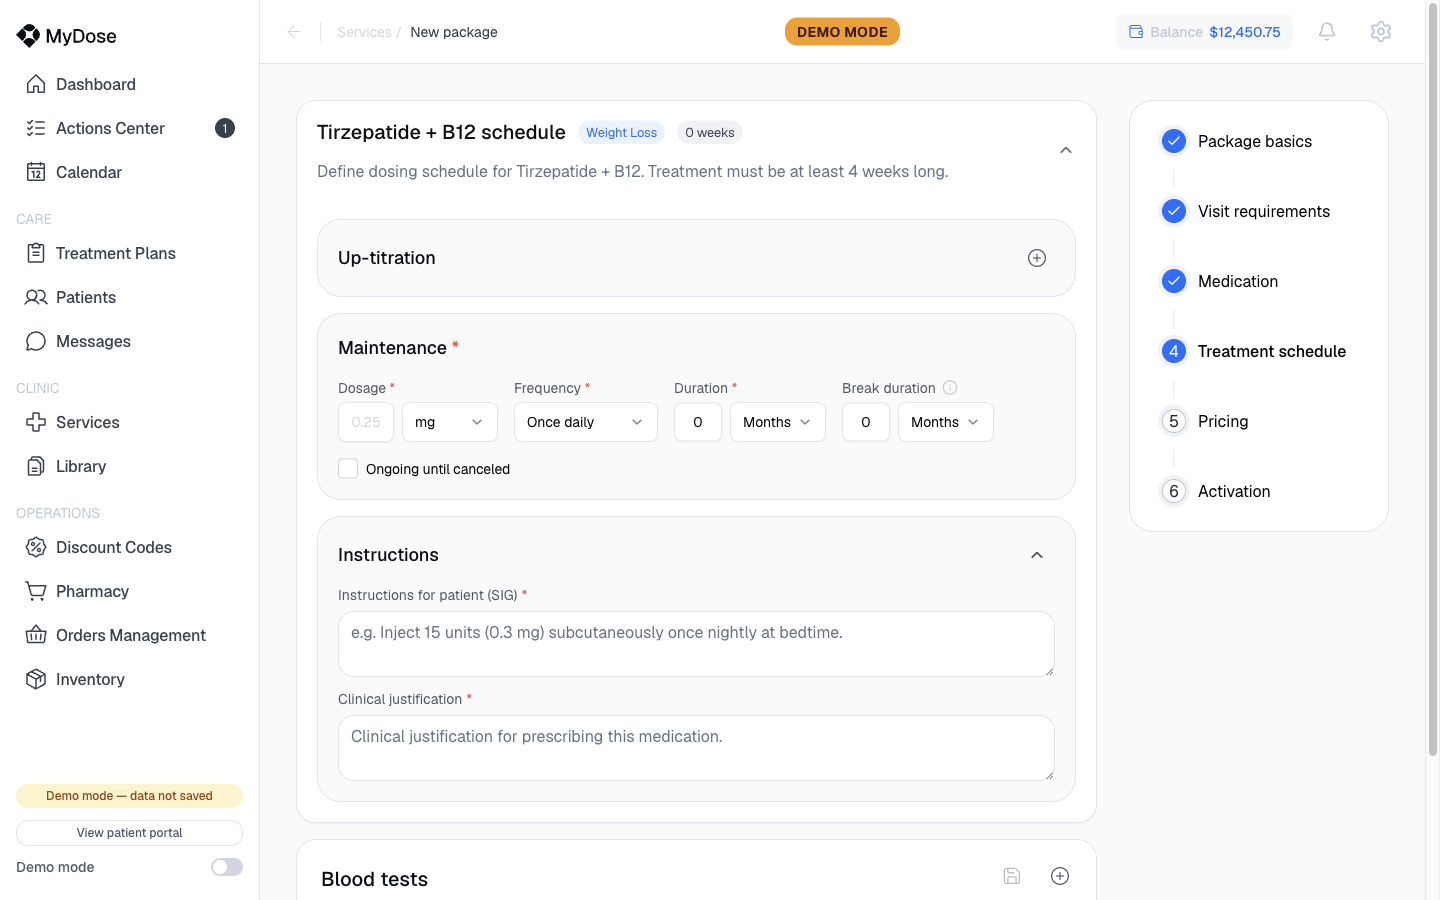
The schedule builder is titled with your medication's name (for example, "Semaglutide schedule") and shows the computed treatment length as you build. Treatment must be at least 4 weeks long.
Add up-titration (optional)
Under Up-titration, select Add up-titration phase to ramp the dose before maintenance.
Set the Maintenance phase
Enter the dose and unit, the frequency (for example, Once daily), and the duration and unit. You can add an optional treatment break, or check Ongoing until canceled for open-ended treatment.
Complete the required Instructions
Fill in both required fields: Instructions for patient (SIG) and Clinical justification.
Add blood tests (optional)
Under Blood tests, select Add blood test for any labs the treatment requires, then select Continue.
Continue stays disabled until the schedule is complete — including the two required Instructions fields and a treatment length of at least 4 weeks.
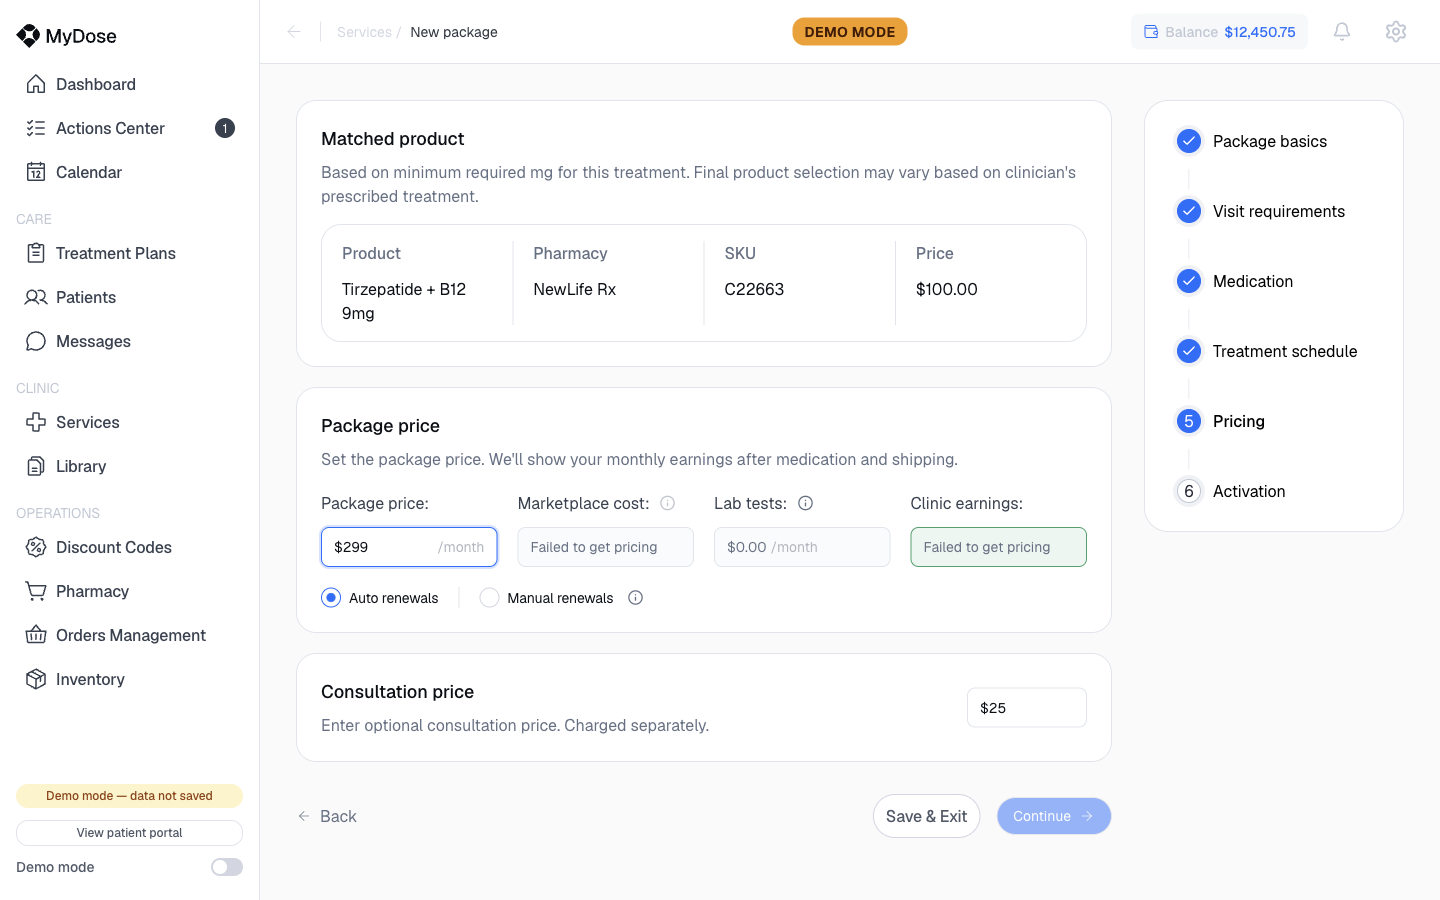
Price the package
Set what patients pay for the package and for consultations.
Review the Matched product
The Matched product summary confirms the medication and form you selected.
Set the Package price
Enter the monthly price in the Package price field. The "How marketplace cost is calculated" and "How lab tests cost is calculated" explainers break down where the money goes.
Choose a renewal model
Select Auto renewals or Manual renewals.
Set the Consultation price
Enter the Consultation price, then select Continue to finish the package.
Building your first package? Practice the wizard in Demo mode so nothing reaches live data — see Navigating the portal for how to switch modes.
Related
Services overview
The Services page — tabs, package rows, and package options.
MyDose Approved packages
Start from a pre-approved treatment instead of building from scratch.
Assign a package
Put your new package to work by assigning it to a patient.
Calendar settings
Set up availability for the consultations your package requires.