Navigating the Portal
Learn the portal's sidebar, header, and gear menu so you can find any page, check your balance, and switch safely between Live and Demo mode.
Every page of the clinic portal shares the same frame: a sidebar on the left for navigation, a header along the top for context and account tools, and a settings menu behind the gear icon. This page maps each part so you always know where to look.
Where to find it
Sign in at app.mydose.ai. The sidebar runs down the left side of every page, the header runs along the top, and the Live mode / Demo mode toggle sits at the very bottom of the sidebar.
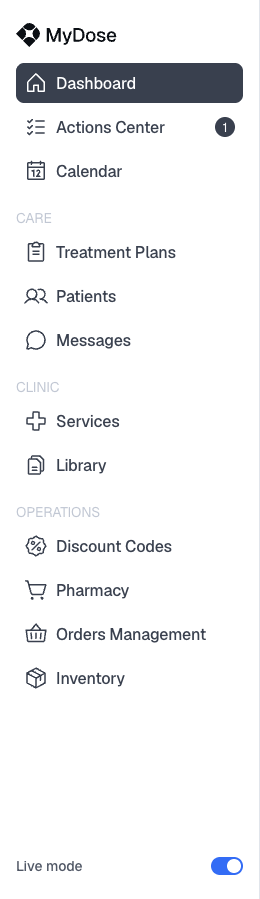
Find anything from the sidebar
The top of the sidebar holds your day-to-day pages — Dashboard, Actions Center, and Calendar. Below that, the rest of the portal is organized into three groups: CARE, CLINIC, and OPERATIONS.
| Sidebar item | Group | What it's for |
|---|---|---|
| Dashboard | Top | Your landing page — patient stats, today's appointments, urgent tasks, a treatments breakdown, and the GETTING STARTED setup checklist. |
| Actions Center | Top | Your work queue. The red badge shows how many items are waiting on you. |
| Calendar | Top | Your clinic's appointment calendar. |
| Treatment Plans | CARE | Build and manage plans for your patients — see Create a treatment plan. |
| Patients | CARE | Your patient list, with search and filters — see Add a patient and Patient progress. |
| Messages | CARE | Your clinic's message inbox — see Messaging. |
| Services | CLINIC | The services your clinic offers. |
| Library | CLINIC | Your clinic's content library. |
| Discount Codes | OPERATIONS | Create and manage discount codes. |
| Pharmacy | OPERATIONS | Pharmacy management. |
| Orders Management | OPERATIONS | Track and manage orders. |
| Inventory | OPERATIONS | Track your clinic's inventory. |
| Live mode / Demo mode | Bottom | Switch between your real clinic data and a safe sandbox — covered below. |
Get oriented in the header

From left to right:
- Back arrow — returns you to the previous page.
- Breadcrumbs — show where you are, for example Settings / User Management.
- Balance chip — shows your current balance (for example, Balance $2.00). Select it to open the account balance page.
- Notification bell — your notifications.
- Gear icon — opens the settings menu, covered next.
Open the gear menu
Select the gear icon in the top-right corner of the header to reach every settings area.
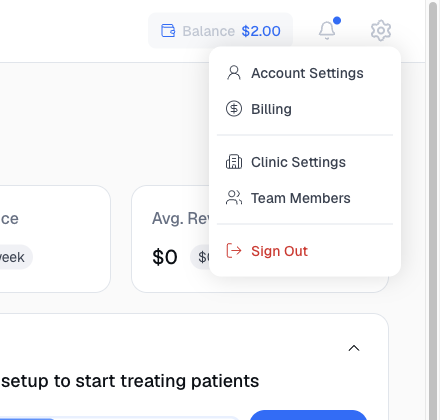
| Menu item | Where it leads |
|---|---|
| Account Settings | Your personal profile, with General, Licensing, E-signature, and Security tabs — see Prescriber credentials. |
| Billing | Your billing details. |
| Clinic Settings | Clinic-level settings — see Clinic setup. |
| Team Members | The User Management page, where you invite team members and manage their access — see Team management. |
| Sign Out | Signs you out of the portal. |
The blue sparkles button floating in the bottom-right corner is Viva, the setup assistant. Select it to Continue clinic setup — it resumes at your first incomplete step. Details in Clinic setup.
Switch between Live and Demo mode
The toggle at the bottom of the sidebar switches the entire portal between your real clinic data (Live mode) and a sandbox filled with sample data (Demo mode). Use Demo mode to explore workflows safely before touching real patient data.
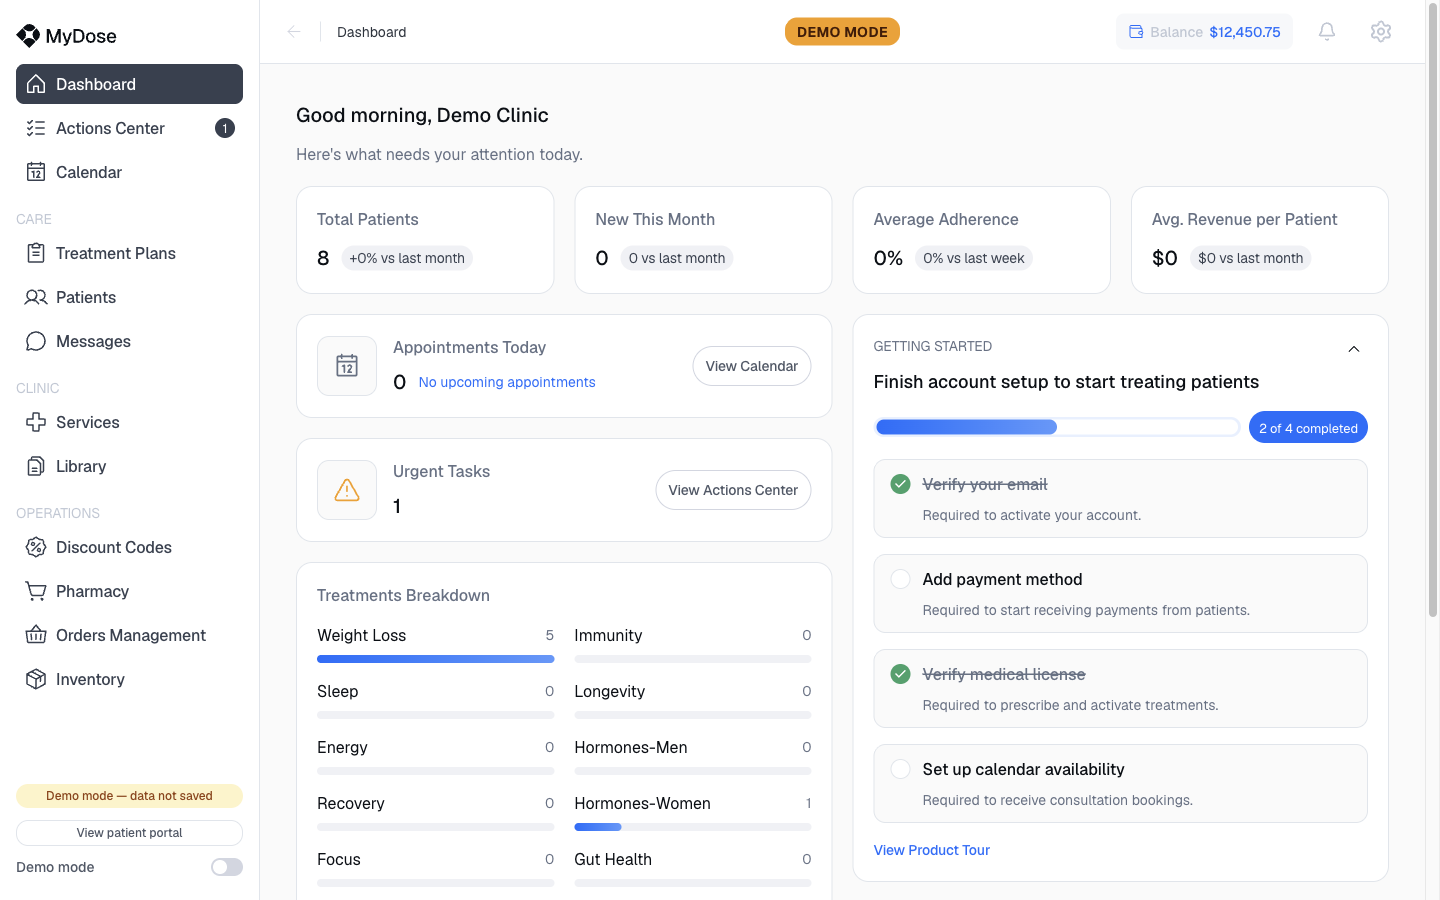
Turn on Demo mode
At the bottom of the sidebar, select Demo mode.
Confirm you're in the sandbox
Look for the amber DEMO MODE badge centered in the header, the Demo mode — data not saved pill at the bottom of the sidebar, and a View patient portal link in the sidebar.
Explore freely
The portal fills with sample data — for example, a balance of $12,450.75. Try any workflow; nothing you do here is saved.
Switch back
Select Live mode at the bottom of the sidebar to return to your real clinic data.
Changes made in Demo mode are not saved. Before doing real work — adding a patient, changing settings — make sure the DEMO MODE badge is no longer showing in the header.